Introduction
This Knowledgebase article outlines the procedure to enable HTTPS on an AWS Elastic Load Balancer (ELB) using Route 53 or an external supplier as the DNS provider and with an AWS generated certificate.
The AWS Certificate Manager (ACM) automatically manages and renews the certificate and this certificate will be accepted by all current browsers without any security exceptions.
The downside is that you do need control over your Hosted DNS name entry - either through Route 53 or through another provider.
Prerequisites
- MarkLogic AWS Cluster
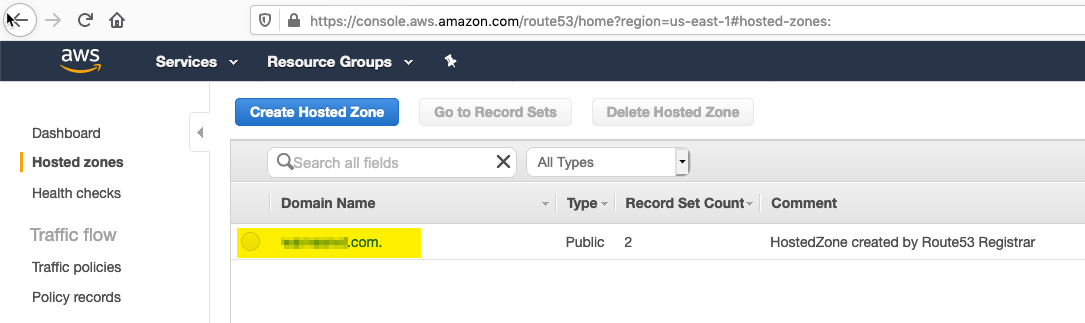
- An AWS Route 53 hosted Domain or similar externally hosted Domain; the procedure described in this article assumes that Route 53 is being used, however where possible we have tried to detail the changes needed and these should also be applicable for another external DNS provider.
Procedure
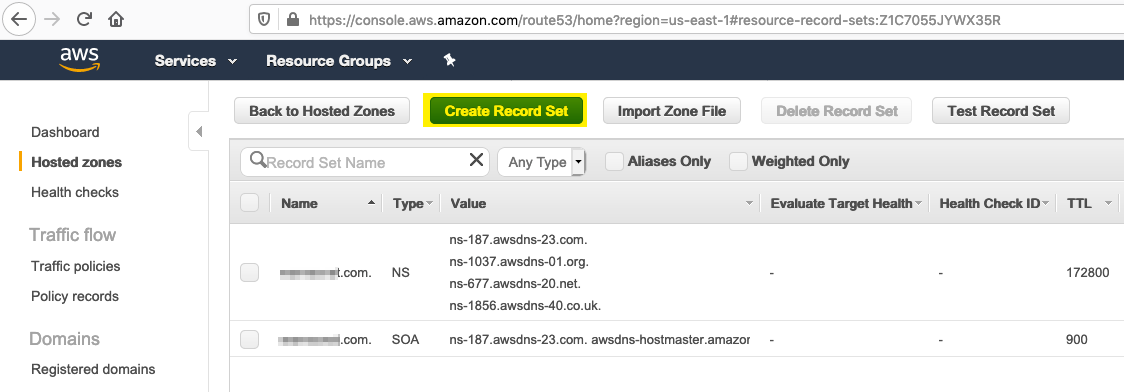
- Click on your hostname in Route 53 to edit it
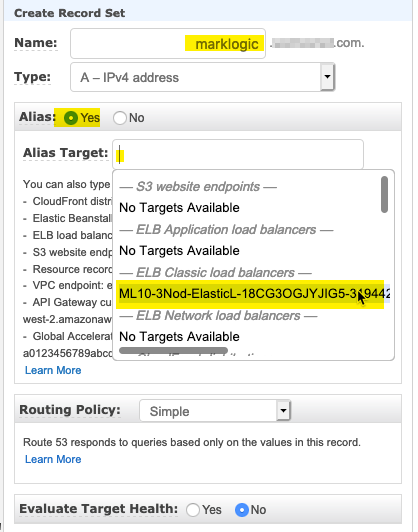
- Create a new Alias Record Set to point to your Elastic Load Balancer.
- In the Record Set entry on the right hand side, enter an Alias name for your ELB host, select Alias and from the Alias Target select the ELB load balancer to use, then click the Create button to update the Route 53 entry.
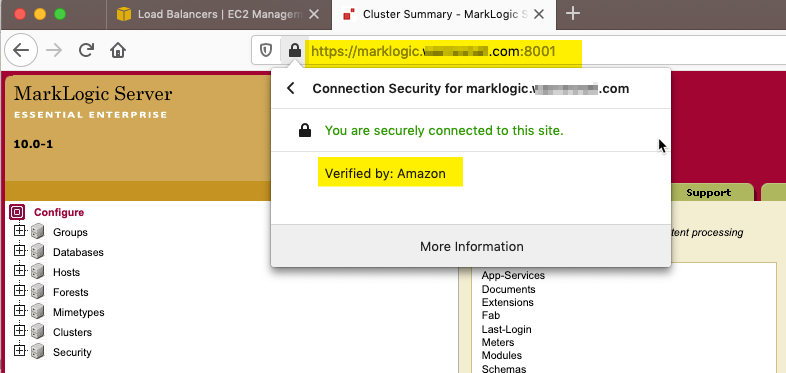
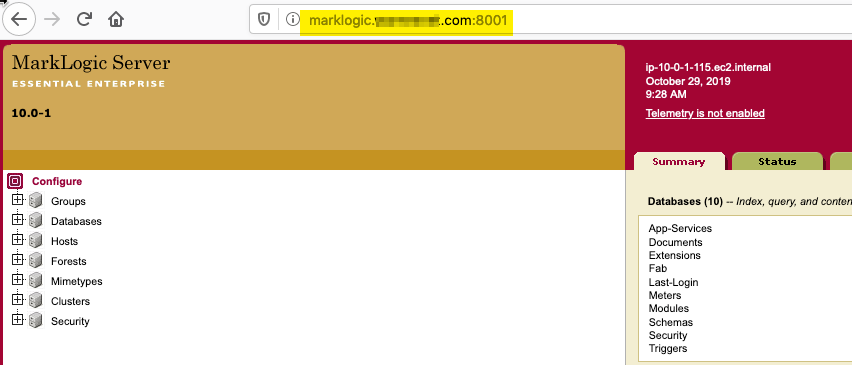
- In can take a little while for AWS to propagate the DNS update throughout the network but once it is available it is worth checking that you are able to reach your MarkLogic cluster using the new address, e.g.
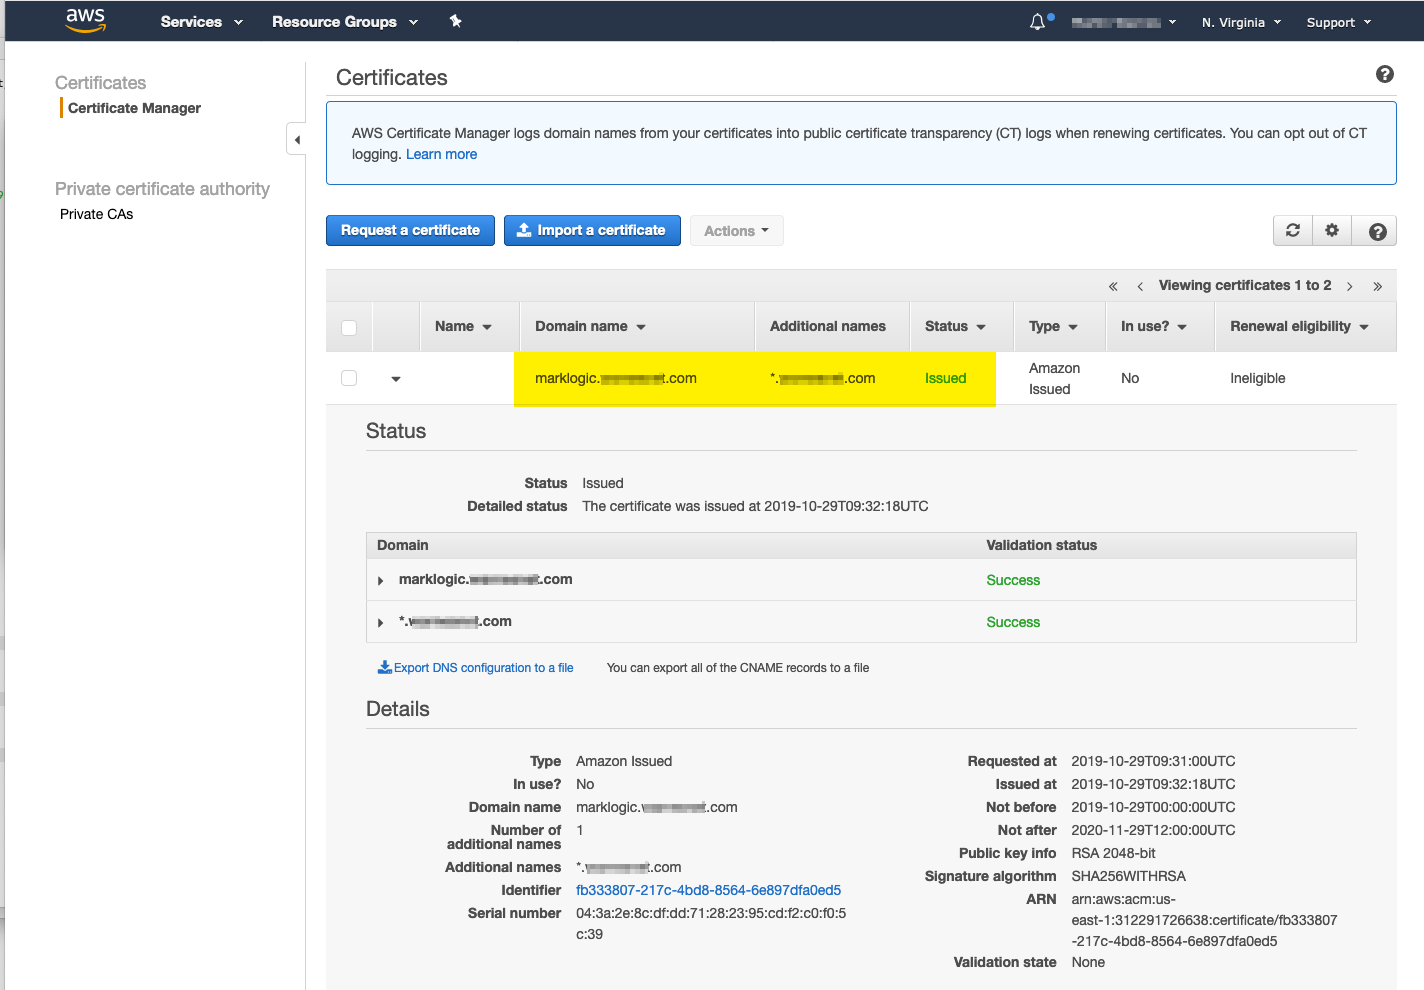
- Once the Route 53 entry is updated and available you will need to request a new certificates through ACM, if you have other certificates already in ACM you can select Request a certificate
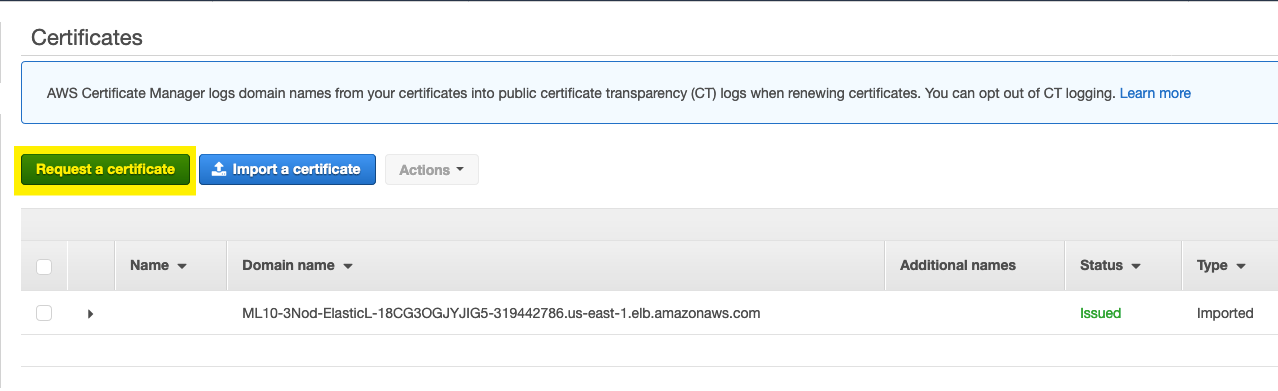
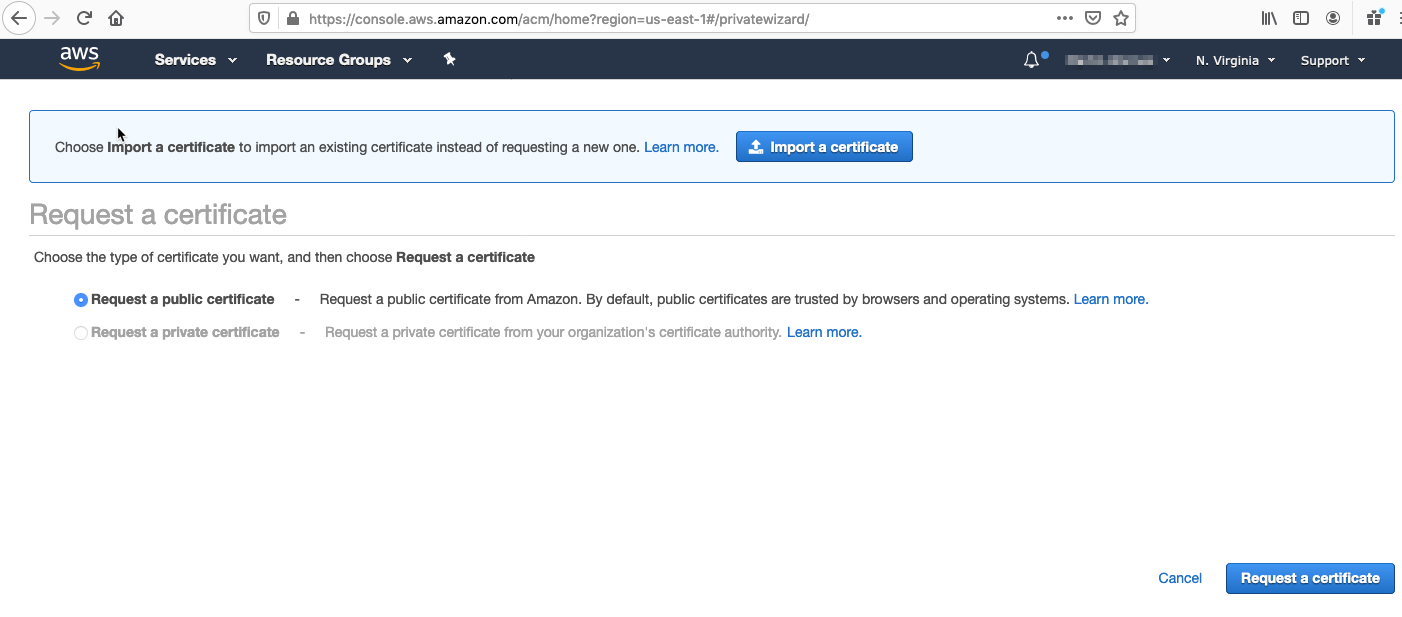
Otherwise select Get Started with Provision Certificates and select Request a public certificate
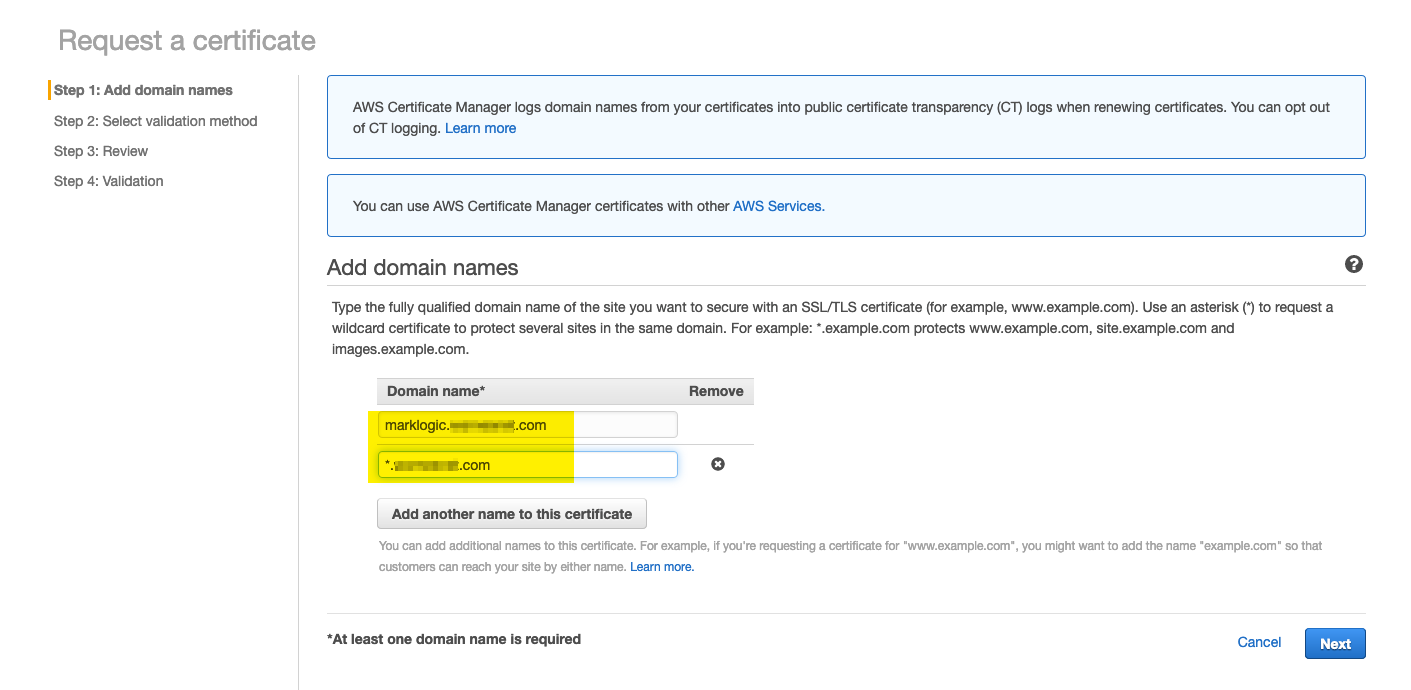
- Enter your required Certificate domain name and click Next:
Note: This should match your DNS Alias name entry created in Step 3.
In addition you can also add additional records such as a "Wildcard" entry, this is particularly useful if you want to use the same certificate for multiple hostnames, e.g if you have Clusters identified by versions such as ml9.[yourdomain].com & ml10.[yourdomain].com
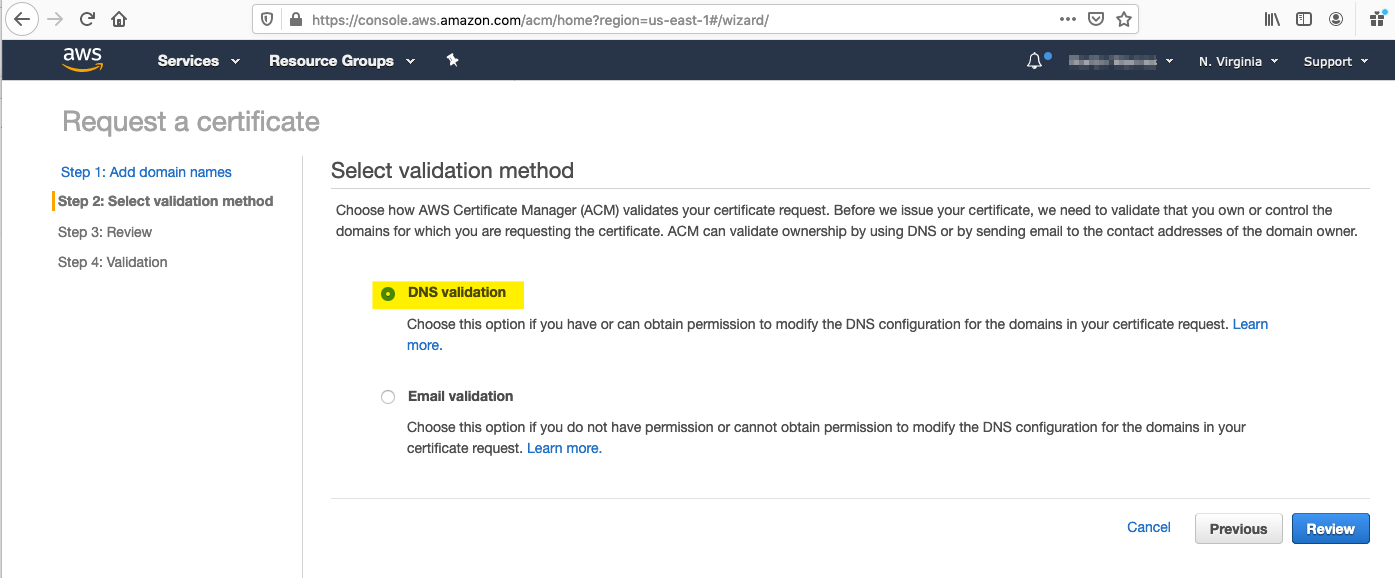
- Select DNS as the Validation Method and click "Review"
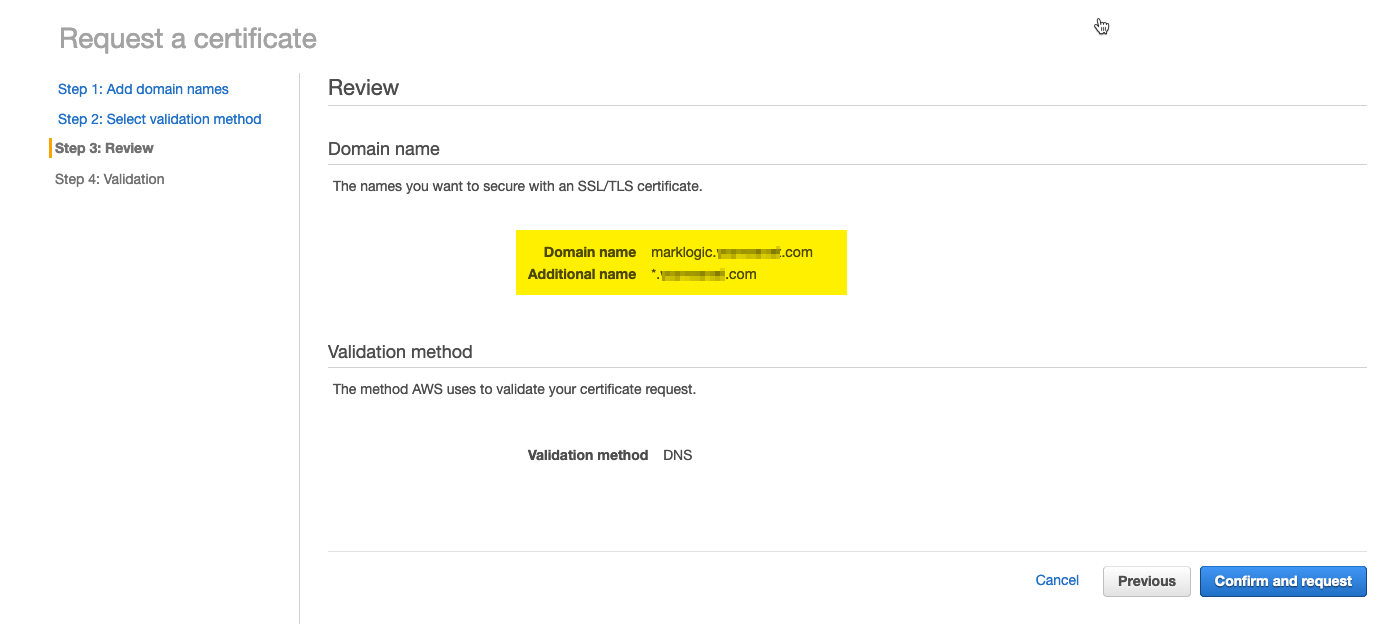
- Before confirming and proceeding check the Hostnames are correct as certificates with invalid hosts names will not be usable.
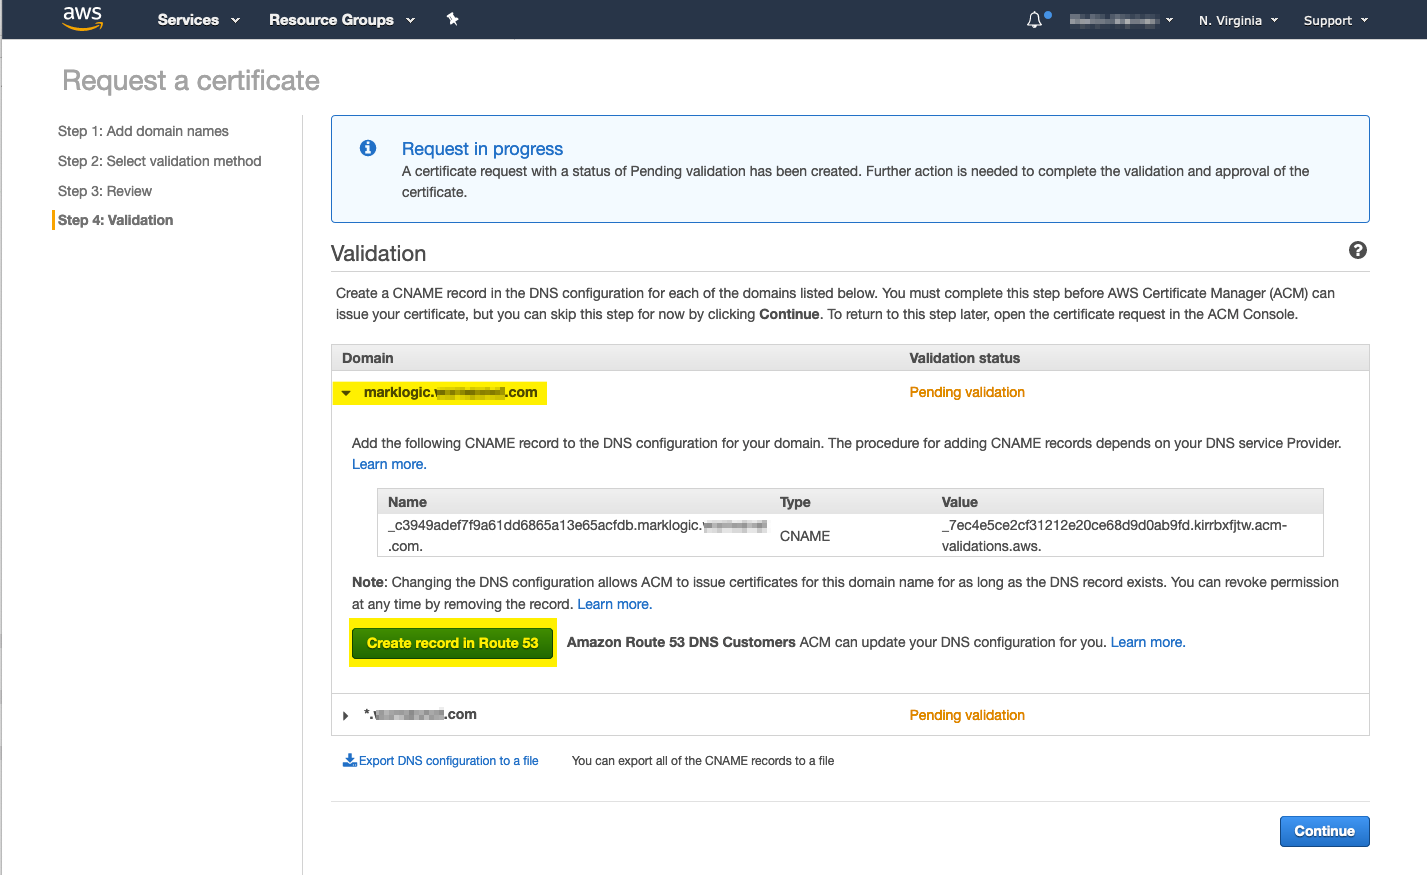
- To complete validation, AWS will require you to add random CNAME entries to the DNS record to confirm that you are the owner. If you are using Route 53 this is as simple as selecting each entry in turn, numbers will vary depending on the number of Doamin name entries you specified in step 6, and clicking "Create record in Route 53". Once all entries have been created click Continue
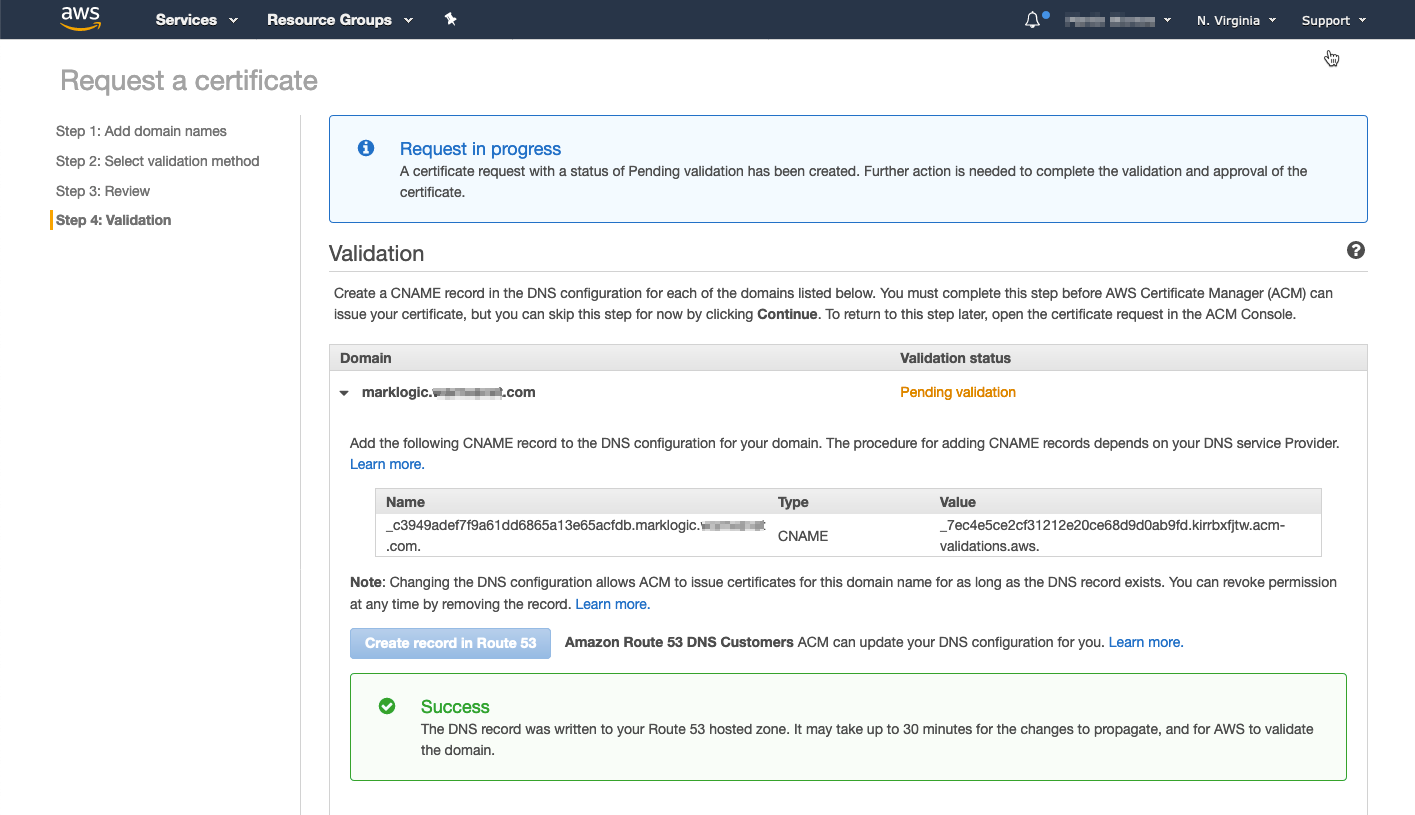
- If the update is successful a Success message is displayed
- If your DNS Hostname is provided by an external provider you will need to download the entries using the "Export DNS configuration to a file link" and provide this information to your DNS provider to make the necessary updates.
The file is a simple CSV file and specifies one or more CNAME entries that need to be created with the required name and values. Once the AWS DNS validation process picks up these changes have been made the certificate creation process will be completed automatically.
Domain Name,Record Name,Record Type,Record Value
marklogic.[yourdomain].com,_c3949adef7f9a61dd6865a13e65acfdb.marklogic.[yourdomain].com.,CNAME,_7ec4e5ce2cf31212e20ce68d9d0ab9fd.kirrbxfjtw.acm-validations.aws.
*.[yourdomain].com,_9b2138934ee9bbe8562af4c66591d2de.[yourdomain].com.,CNAME,_924153c45d53922d31f7d254a216aed0.kirrbxfjtw.acm-validations.aws.
- Once the Certificate has been validated by either of the methods in Steps 9 or 11 the certificate will be marked as Issued and be available for the Load Balancer to use.
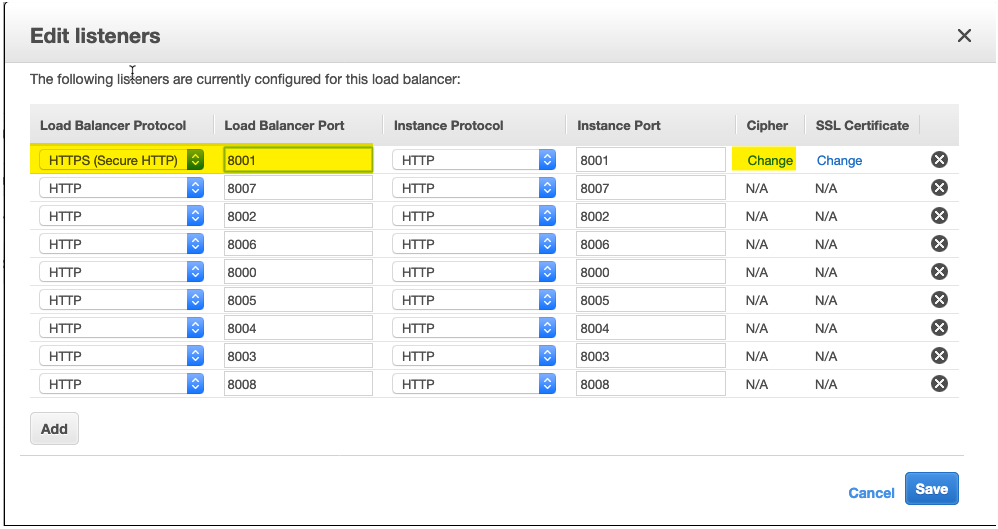
- Configure the ELB for HTTPS And the new AWS generated Certificate
- Edit the ELB Listeners and change the Cipher
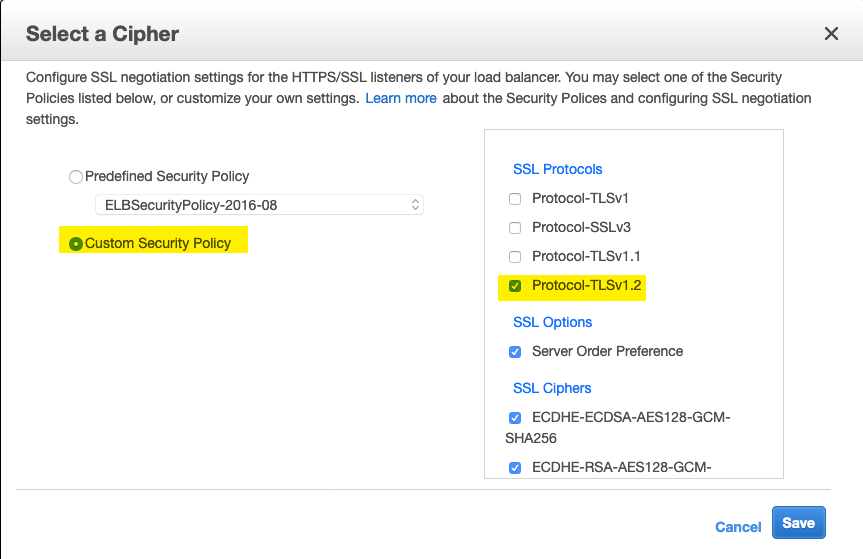
- (Optional) For production environments it is recommended to allow TLSv1.2 only
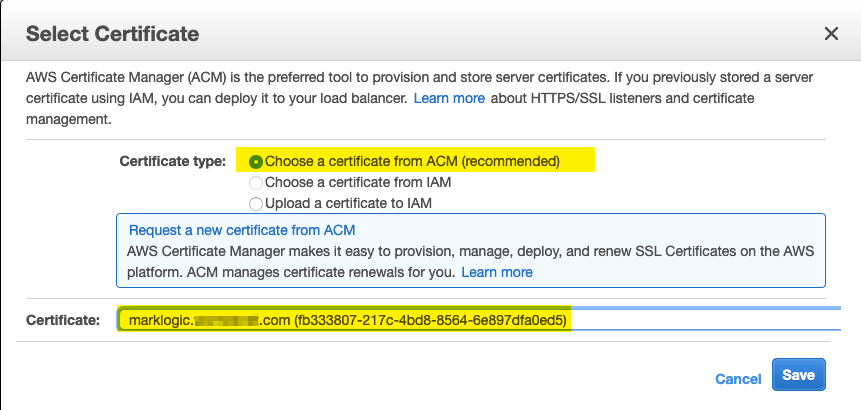
- Next select the Certificate and repeat Steps 15 and 16 for each listener that you want to secure.
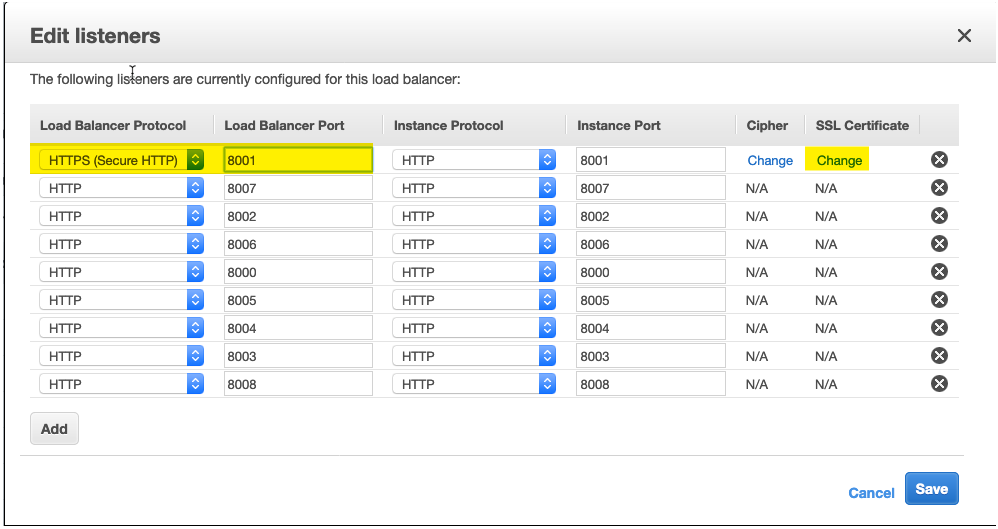
- From the ACM available certificates select the newly generated certificate for this domain and click Save
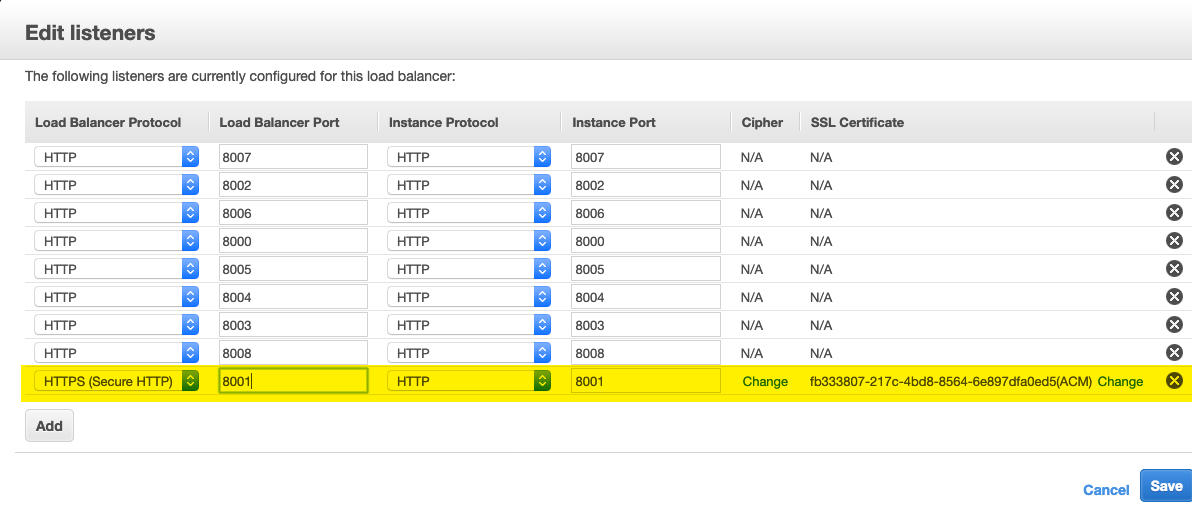
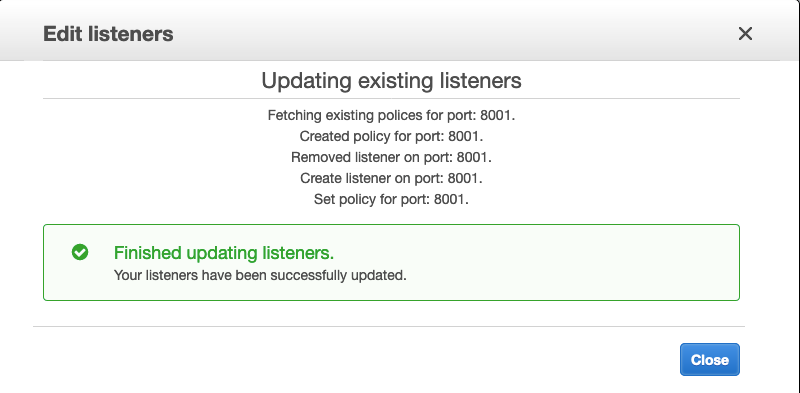
- Save the Listeners updates and ensure the update was successful.
- You should now be able to access your MarkLogic cluster securely over HTTPS using the AWS generated certificate.